The Ultimate Homemade Funfetti Birthday Cake: A Slice of Pure Nostalgia
Whatever the theme was—superheroes, princesses, or dinosaurs—there is a good chance the highlight of the day was a slice of tender vanilla cake, studded with colorful polka dots of sugar, slathered in sweet frosting, and glowing under the light of flickering candles.
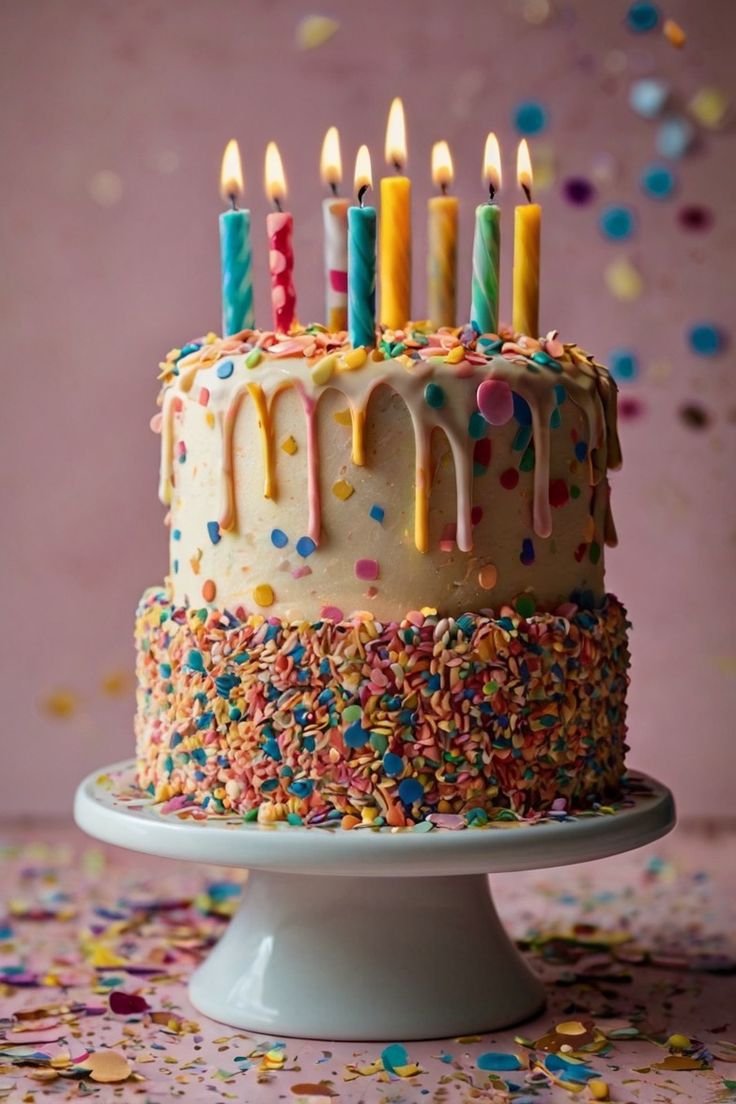
The Funfetti Cake (or Confetti Cake) is the undisputed champion of birthday desserts. It is happiness in cake form.
While the yellow box mix from the grocery store holds a special place in our hearts, making a Funfetti cake from scratch is a revelation. We are talking about a dense, buttery crumb that tastes like real vanilla (not chemicals), a frosting that melts on your tongue, and a rainbow explosion that remains bright and distinct without bleeding into the batter.
Whether you are baking for a toddler, a best friend, or just because you survived the work week, this Homemade Funfetti Birthday Cake with Rainbow Sprinkles is the perfect way to say “Let’s Celebrate.”
Why Ditch the Box Mix?
You might be wondering, “Is it really worth the extra effort to bake this from scratch?”
The short answer: Yes.
The long answer involves texture and flavor depth. Box mixes are often incredibly light and airy due to chemical emulsifiers, but they can lack substance. They also tend to have a distinct “artificial” vanilla flavor.
This homemade version uses a combination of butter and oil.1 The butter provides that rich, bakery-style flavor, while the oil ensures the cake stays incredibly moist for days.2 We also use sour cream to add a subtle tang that cuts through the sugar, creating a sophisticated balance that adults will appreciate just as much as the kids.
Plus, when you make it yourself, you control the sprinkle-to-batter ratio. And in this house, we believe there is no such thing as “too many sprinkles.”
The “Sprinkle Science”: Use the Right Type!
Before you run to the pantry, stop! This is the most critical part of the entire recipe. Not all sprinkles are created equal. If you use the wrong kind, you won’t get a Funfetti cake; you will get a gray, muddy mess.
1. The Good: Rainbow “Jimmies”
You want the cylinder-shaped strands (often called “Jimmies”). These are made with a binder that holds up well against heat and moisture. They will melt slightly in the oven to create those perfect colorful dots, but they won’t bleed their dye into the batter during mixing.
2. The Bad: Nonpareils
These are the tiny, round balls. Do not use these inside the batter. They bleed instantly when wet. If you mix these into your cake batter, your beautiful vanilla cake will turn a weird shade of purple-gray. Save these for decorating the outside of the cake only.
3. The Ugly: Sanding Sugar / Crystal Sugar
These will simply dissolve into the batter and disappear, leaving you with crunchy pockets of sugar but no color.
Tips for the Perfect “White” Cake Base
To make the colors pop, we want the cake sponge to be as white as possible.
- Egg Whites Only: Many vanilla cakes use whole eggs. However, egg yolks add a yellow tint. By using only egg whites, we keep the crumb pale and pristine, making it the perfect canvas for the rainbow spots.
- Clear Vanilla Extract: If you want a stark white cake (like a wedding cake), professionals use clear imitation vanilla. However, for a birthday cake where flavor is king, pure vanilla extract is preferred. It adds a very slight ivory tint, but the flavor payoff is worth it.
- Room Temperature Ingredients: This is non-negotiable. Your butter, egg whites, sour cream, and milk must be at room temperature. If they are cold, the batter will curdle (look chunky) and the cake won’t rise evenly.
Recipe: Ultimate Funfetti Birthday Cake
Prep Time: 40 mins | Cook Time: 30 mins | Yields: Three 6-inch rounds or Two 8-inch rounds
Ingredients
For the Cake Batter:
- Cake Flour: 2 ½ cups (300g) — Sifted. (If you don’t have cake flour, see the note below!)
- Baking Powder: 2 tsp
- Baking Soda: ½ tsp
- Salt: 1 tsp
- Unsalted Butter: ¾ cup (170g) — Room temperature.
- Granulated Sugar: 1 ½ cups (300g)
- Vegetable Oil: ¼ cup (60ml) — Or canola oil.
- Egg Whites: 5 large egg whites — Room temperature.
- Sour Cream: ⅓ cup (80g) — Room temperature.
- Vanilla Extract: 1 tbsp — Measure with your heart!
- Whole Milk: ¾ cup (180ml) — Room temperature.
- Rainbow Sprinkles (Jimmies): ½ cup (85g) — Plus more for decorating.
For the Classic Vanilla Buttercream:
- Unsalted Butter: 1 ½ cups (340g) — Slightly softened but cool.
- Powdered Sugar: 5 to 6 cups (600g-720g) — Sifted.
- Heavy Cream: 3-4 tbsp
- Vanilla Extract: 2 tsp
- Salt: ¼ tsp — To cut the sweetness.
Instructions
Phase 1: The Cake
- Prep the Oven & Pans: Preheat your oven to 350°F (175°C).3 Grease your cake pans, line the bottoms with parchment paper rounds, and grease the parchment. Dust with a little flour and tap out the excess.
- Whisk Dry Ingredients: In a medium bowl, whisk together the cake flour, baking powder, baking soda, and salt. Set aside.
- Cream Butter & Sugar: In the bowl of a stand mixer fitted with the paddle attachment (or using a hand mixer), beat the butter, sugar, and oil on medium-high speed for about 3-5 minutes. The mixture should look aerated, fluffy, and almost white.
- Add Wet Ingredients: Turn the mixer to low. Add the egg whites one at a time, mixing well after each. Add the sour cream and vanilla extract. Scrape down the sides of the bowl to ensure everything is incorporated.
- Alternate Dry & Milk: With the mixer on low speed, add ⅓ of the dry flour mixture. Then add ½ of the milk. Repeat (flour, milk, flour). Stop mixing immediately once the last streaks of flour disappear. Do not overmix!
- The Fun Part: Remove the bowl from the mixer. Gently fold in the ½ cup of rainbow sprinkles using a rubber spatula. Use a light hand so you don’t break the sprinkles.
- Bake: Divide the batter evenly between the prepared pans. Bake for 25-30 minutes, or until a toothpick inserted into the center comes out clean or with just a few moist crumbs.
- Cool: Let the cakes cool in the pans for 10 minutes, then carefully flip them onto a wire rack to cool completely. Never frost a warm cake!
Phase 2: The Buttercream
- Beat the Butter: In your mixer, beat the butter on medium-high speed for 5 minutes. Yes, 5 full minutes. It should become incredibly pale and creamy.
- Add Sugar Gradually: Turn the mixer to low. Add the powdered sugar one cup at a time.
- Whip it Up: Add the vanilla, salt, and 2 tablespoons of heavy cream. Increase speed to high and whip for 3 minutes.
- Adjust Texture: If the frosting is too stiff, add more cream one teaspoon at a time. If it’s too runny, add a bit more sugar. You want a spreadable, fluffy consistency.
Phase 3: Assembly & Decoration
- Stack: Place one cake layer on your stand. Spread a generous layer of buttercream on top. Repeat with the remaining layers.
- Crumb Coat: Spread a very thin layer of frosting all over the outside of the cake to trap any loose crumbs. Chill in the fridge for 20 minutes.
- Final Frost: Apply the remaining buttercream smoothly over the top and sides. You can use an offset spatula to make swirls or a bench scraper for smooth sides.
- Explosion of Color: This is where you get creative!
- The Rim: Press a handful of sprinkles gently around the bottom rim of the cake.
- The Crown: Sprinkle a ring of confetti around the top edge.
- The Full Coat: If you are feeling bold, press sprinkles all over the entire cake!
- The Candles: No birthday cake is complete without them. Place your candles (tall, metallic ones look elegant; classic stripes look fun) in the center or spaced evenly around the perimeter.
Making Your Own Cake Flour
If you don’t have cake flour, you can make a substitute!
For every 1 cup of all-purpose flour, remove 2 tablespoons of flour and replace them with 2 tablespoons of cornstarch. Sift them together twice to aerate the mixture. This lowers the protein content and mimics the tenderness of cake flour.
Storage Instructions
- Room Temperature: The cake can sit in a cake keeper at room temperature for up to 3 days. The sugar in the frosting acts as a preservative.
- Freezing: You can freeze the baked (unfrosted) cake layers for up to 2 months.4 Wrap them tightly in plastic wrap and then foil. Thaw in the fridge overnight before decorating.
Final Thoughts: Make a Wish!
There is a specific kind of magic that happens when you bring out a Funfetti Birthday Cake. The lights go down, the candles flicker, and for a brief moment, everyone—kids and adults alike—stops what they are doing to sing and smile.
Cutting into this cake reveals a hidden party inside. The joy of seeing those colorful speckles against the white crumb never gets old. It’s sweet, it’s buttery, and it is undeniably happy.
So, grab your biggest bowl, your brightest sprinkles, and get baking.