No-Bake Oreo Cheesecake with Chocolate Cookie Crust
This No-Bake Oreo Cheesecake with Chocolate Cookie Crust is the ultimate dessert for Oreo lovers. It’s creamy, rich, and indulgent without being overly complicated. Whether you’re making it for a family gathering, a dinner party, or just because you’re craving something sweet, this cheesecake is sure to impress. Best of all, it’s beginner-friendly and doesn’t require turning on the oven.
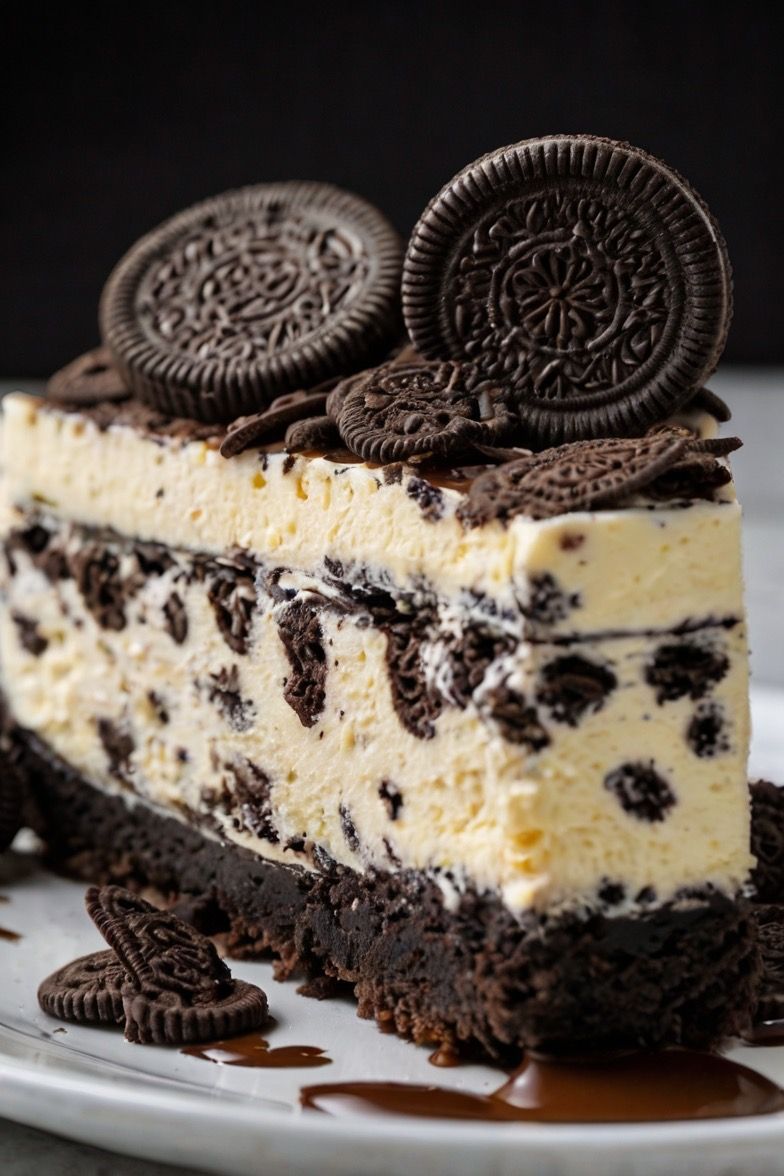
No-Bake Oreo Cheesecake – Creamy Dessert with Chocolate Cookie Crust
If you love Oreo cookies and creamy cheesecakes, this Oreo Cheesecake will be your new favorite dessert. It’s rich, velvety, and bursting with crunchy Oreo flavor in every bite. Unlike traditional baked cheesecakes, this no-bake version requires no oven, making it perfect for beginner bakers or anyone short on time. The chocolate cookie crust provides the perfect crunchy base, while the light and fluffy cream cheese filling is packed with Oreo pieces. This recipe is easy, fuss-free, and ideal for parties, birthdays, holidays, or just a sweet indulgence at home.
Ingredients
Equipment
Method
Instructions
Step 1: Make the Oreo Crust
- Place 24 Oreo cookies into a food processor and pulse until they form fine crumbs.
- (Tip: If you don’t have a food processor, place the cookies in a zip-top bag and crush them with a rolling pin.)
- Add melted butter to the crushed Oreos and mix until the crumbs resemble wet sand.
- Transfer the mixture to a 9-inch springform pan. Use the back of a spoon to firmly press the crumbs into an even layer at the bottom.
- Place the pan in the fridge to set while you prepare the filling.
Step 2: Prepare the Cheesecake Filling
- In a large bowl, beat softened cream cheese with powdered sugar and vanilla extract until smooth and creamy.
- In a separate chilled bowl, whip the cold heavy cream until stiff peaks form.
- Gently fold the whipped cream into the cream cheese mixture using a spatula. Be careful not to deflate the mixture.
- Stir in the chopped Oreo cookies until evenly distributed.
Step 3: Assemble the Cheesecake
- Pour the cheesecake filling over the chilled Oreo crust.
- Smooth the top with a spatula for an even surface.
- Cover with plastic wrap and refrigerate for at least 4–6 hours, or overnight if possible. This helps the cheesecake set properly.
Step 4: Decorate and Serve
- Once set, carefully remove the cheesecake from the springform pan.
- Decorate the top with whipped cream, whole Oreos, or crushed Oreo crumbs.
- Slice into 10–12 portions and enjoy!
Notes
FAQ – No-Bake Oreo Cheesecake
1. Can I make this cheesecake ahead of time?
Yes! This dessert is perfect for making ahead. In fact, it tastes even better the next day after chilling overnight. You can prepare it 1–2 days in advance and keep it covered in the fridge.2. How long does No-Bake Oreo Cheesecake last?
Stored properly in an airtight container in the refrigerator, it will last for about 4–5 days. You can also freeze it (without toppings) for up to 2 months.3. Can I use low-fat cream cheese?
It’s best to use full-fat cream cheese for the richest flavor and creamiest texture. Low-fat versions may cause the cheesecake to be softer and less stable.4. Do I need gelatin for this recipe?
No gelatin is required. The whipped cream provides structure, making the cheesecake firm enough to slice without baking or gelatin.5. Can I substitute the Oreos with another cookie?
Yes! While Oreos add a unique flavor, you can use other chocolate sandwich cookies or even graham crackers for the crust.6. My cheesecake didn’t set properly—what went wrong?
This usually happens if the whipped cream wasn’t whipped to stiff peaks or if the cheesecake didn’t chill long enough. Be sure to whip the cream correctly and allow a minimum of 4–6 hours chilling time.Tips for the Perfect No-Bake Oreo Cheesecake
- Chill your mixing bowl and whisk before whipping the cream. This helps it whip faster and hold its shape.
- Press the crust firmly into the pan to prevent it from crumbling when slicing.
- Don’t overmix the whipped cream when folding it into the cream cheese mixture, or you’ll lose the airy texture.
- Add extra Oreos on top for a bakery-style look that impresses guests.
- For clean slices, dip your knife into hot water, wipe it dry, and cut each piece.
- No oven needed – perfect for hot days.
- Quick to prepare with minimal effort.
- Perfect balance of creamy cheesecake and crunchy Oreos.
- Crowd-pleasing dessert for any occasion.
- Easily customizable with different toppings and mix-ins.