Classic Mille Crepe Cake with Berries and Maple Drizzle
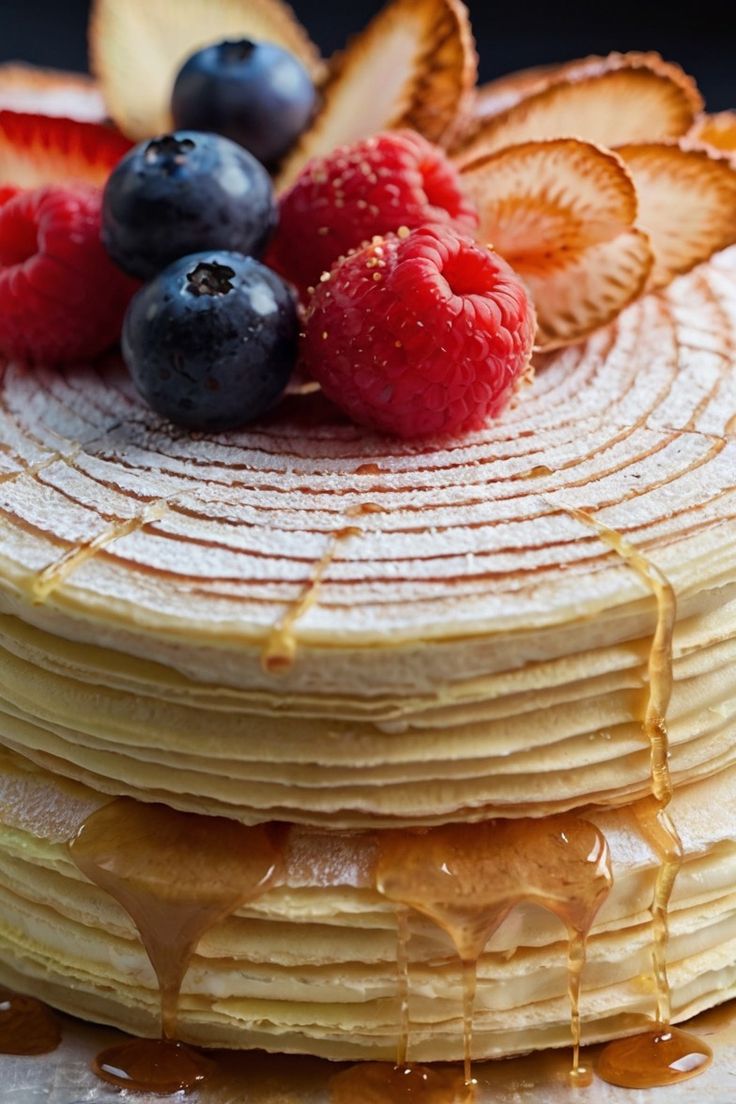
A Mille Crepe Cake is a showstopper of a dessert, renowned for its elegant simplicity and delicate texture. This recipe guides you through creating dozens of paper-thin crepes, stacking them with a light, velvety whipped cream filling, and finishing the masterpiece with fresh berries and a hint of maple sweetness. It’s a project that requires a bit of patience, but the stunning, light-as-air result is absolutely worth the effort.
Part 1: The Delicate Crepes
The foundation of a perfect Mille Crepe cake is a batch of uniform, delicate crepes. A key step is to let the batter rest, which allows the gluten to relax and ensures a tender texture.
Crepe Ingredients
- 2 cups whole milk, room temperature
- 4 large eggs, room temperature
- ½ cup granulated sugar
- ¼ cup unsalted butter, melted and cooled slightly
- 1 ½ cups all-purpose flour, sifted
- ¼ teaspoon salt
- 1 teaspoon vanilla extract
Crepe Instructions
- Make the Batter: In a large bowl, whisk together the milk, eggs, sugar, melted butter, and vanilla extract until well combined. Gradually whisk in the sifted flour and salt until the batter is smooth. A few tiny lumps are okay.
- Rest the Batter: For best results, cover the bowl with plastic wrap and refrigerate the batter for at least 1 hour, or up to 24 hours. This resting time is crucial for creating tender, non-chewy crepes.
- Prepare to Cook: Heat a 9-inch non-stick skillet or crepe pan over medium-low heat. Lightly grease the pan with a little butter or cooking spray.
- Cook the Crepes: Pour about ¼ cup of batter into the center of the pan. Immediately tilt and swirl the pan to coat the bottom evenly with a thin layer of batter. Cook for 1-2 minutes, or until the edges begin to crisp and the top looks dry.
- Flip & Repeat: Use a thin spatula or your fingers to carefully lift the edge of the crepe and flip it. Cook for another 30 seconds to 1 minute, just until lightly browned.
- Stack: Slide the finished crepe onto a plate. Continue with the remaining batter, stacking the crepes as you finish them. You should have 20-25 crepes. Let the stack cool completely before assembly.
Part 2: The Light Whipped Cream Filling
This simple, stable whipped cream is the perfect counterpoint to the crepes, providing a light and creamy texture that doesn’t feel heavy.
Whipped Cream Ingredients
- 3 cups heavy whipping cream, chilled
- ½ cup powdered sugar
- 1 teaspoon vanilla extract
- ¼ teaspoon salt
Whipped Cream Instructions
- Place a large mixing bowl and the whisk attachment of your mixer in the freezer for at least 15 minutes.
- Pour the cold heavy cream into the chilled bowl. Begin whisking on low speed, gradually increasing to high.
- As soft peaks begin to form, add the powdered sugar, vanilla extract, and salt. Continue to whisk until stiff peaks form. The whipped cream should hold its shape firmly. Be careful not to overmix, or it will turn to butter.
Part 3: Assembly
This is the most satisfying part, watching your delicate layers build into a stunning cake.
Assembly Instructions
- Place one cooled crepe on a flat cake stand or serving plate.
- Spread about 2-3 tablespoons of the whipped cream evenly over the crepe, using an offset spatula. Spread the cream to the very edge of the crepe.
- Place a second crepe on top and repeat the process, pressing gently to make a compact, even stack.
- Continue layering until all the crepes are used, finishing with a final crepe on top with no cream.
- Chill the Cake: To help the layers set and the cake become stable, cover the assembled cake loosely with plastic wrap and refrigerate for at least 4 hours, or preferably overnight.
Part 4: Berries and Maple Drizzle Topping
The final touches add color, freshness, and flavor, completing the elegant presentation.
Topping Ingredients
- 1-2 cups fresh mixed berries (strawberries, raspberries, blueberries)
- ¼ cup maple syrup or honey
Topping Instructions
- Just before serving, arrange the fresh berries in a beautiful pattern on top of the cake.
- Gently drizzle the maple syrup or honey over the berries and the top of the cake.
Serving and Storage
- To get clean slices, use a long, sharp knife and cut straight down.
- This cake is best served immediately after decorating. Store any leftovers in an airtight container in the refrigerator for up to 2-3 days.