Chocolate Raspberry Layer Cake with Ganache
Here is a detailed recipe for a Chocolate Raspberry Layer Cake with Ganache. This recipe is divided into four main sections: the chocolate cake layers, the raspberry filling, the chocolate ganache, and the assembly. Each part is crucial for creating a balanced and beautiful cake.
This recipe yields a three-layer, 8-inch cake, serving 12 to 16 people.
Part 1: The Moist Chocolate Cake Layers
This cake is known for its rich, tender, and moist texture.1 The secret to a perfect crumb is using a combination of melted butter and oil, along with hot coffee which enhances the deep chocolate flavor without making the cake taste like coffee.
Ingredients
- 1 ¾ cups (220g) all-purpose flour
- 2 cups (400g) granulated sugar
- ¾ cup (65g) unsweetened cocoa powder (preferably a good quality Dutch-process)
- 1 ½ teaspoons baking soda
- 1 ½ teaspoons baking powder
- 1 teaspoon fine sea salt
- ½ cup (113g) unsalted butter, melted and cooled
- ½ cup (120ml) neutral-flavored vegetable oil
- 1 cup (240ml) buttermilk, at room temperature (or 1 cup milk + 1 tbsp lemon juice, stirred and let sit for 5 minutes)
- 2 large eggs, at room temperature
- 2 teaspoons pure vanilla extract
- 1 cup (240ml) freshly brewed hot coffee
Instructions
- Preheat and prepare. Preheat your oven to 350°F (175°C). Grease and flour three 8-inch round cake pans. For an easier release, you can also line the bottom of each pan with a circle of parchment paper.
- Combine dry ingredients. In a large bowl, whisk together the all-purpose flour, granulated sugar, cocoa powder, baking soda, baking powder, and salt. Make sure everything is well combined to avoid lumps in the final cake.
- Mix wet ingredients. In a separate large bowl, whisk together the melted and cooled butter, vegetable oil, buttermilk, eggs, and vanilla extract until well combined and smooth. Ensure your eggs and buttermilk are at room temperature to prevent the batter from seizing and to create a more uniform mixture.
- Combine wet and dry. Pour the wet ingredient mixture into the dry ingredients. Use a whisk to mix on low speed until the batter is just combined. Be careful not to overmix, as this can lead to a tough, dense cake. Scrape down the sides of the bowl with a spatula to ensure all ingredients are incorporated.
- Add the hot coffee. Gently and slowly pour the hot coffee into the batter while mixing on low speed. The batter will become very thin—this is normal. The hot coffee helps to “bloom” the cocoa powder, which intensifies the chocolate flavor, and keeps the cake incredibly moist. Mix just until the coffee is incorporated.
- Bake the layers. Divide the thin batter evenly among the three prepared cake pans. You can use a kitchen scale for precision. Place the pans in the preheated oven and bake for 25-30 minutes, or until a toothpick inserted into the center of the cakes comes out clean.
- Cool the cakes. Let the cakes cool in their pans on a wire rack for about 10-15 minutes. Then, gently run a knife around the edges to loosen them and invert the cakes onto the wire rack to cool completely. The cakes must be completely cool before you begin to assemble and frost them.
Part 2: The Bright Raspberry Filling
This filling provides a beautiful, tart contrast to the rich chocolate cake and ganache. A homemade filling offers a fresher flavor than store-bought jam.
Ingredients
- 2 cups (about 250g) fresh or frozen raspberries
- ½ cup (100g) granulated sugar
- 2 tablespoons cornstarch
- 1 tablespoon fresh lemon juice
- 2 tablespoons water
Instructions
- Combine ingredients. In a small saucepan, whisk together the sugar and cornstarch until no lumps remain. This is important to prevent a grainy filling.
- Cook the filling. Add the raspberries, lemon juice, and water to the saucepan. Place the pan over medium heat. Stir constantly, mashing the berries with the back of a spoon as they soften. Continue to cook until the mixture thickens and starts to bubble. This should take about 5-7 minutes.
- Strain (optional). If you prefer a seedless filling, press the mixture through a fine-mesh sieve with a spatula to remove all the seeds. This step is optional but creates a smoother filling.
- Cool completely. Transfer the filling to a bowl and cover it directly with plastic wrap to prevent a skin from forming. Let it cool completely to room temperature, then refrigerate for at least 30 minutes, or until it has thickened to a jam-like consistency.
Part 3: The Silky Chocolate Ganache
Ganache is a simple yet luxurious frosting or glaze made from just chocolate and heavy cream. The ratio of these two ingredients determines its final consistency. For this cake, a 1:1 ratio by weight is perfect for a thick, spreadable ganache.
Ingredients
- 12 ounces (340g) good quality semi-sweet or dark chocolate, finely chopped or in chips
- 1 ½ cups (360ml) heavy whipping cream
Instructions
- Prepare the chocolate. Finely chop the chocolate and place it in a large, heat-proof bowl. Finely chopped chocolate will melt more evenly and quickly, preventing the ganache from becoming grainy.
- Heat the cream. Pour the heavy cream into a small saucepan and heat it over medium heat until it just begins to simmer, with small bubbles forming around the edges. Do not let it come to a full, rolling boil.
- Combine and whisk. As soon as the cream is ready, pour it directly over the chopped chocolate in the bowl. Let it sit for 5 minutes without stirring. This allows the heat from the cream to melt the chocolate completely.
- Stir until smooth. After 5 minutes, begin to gently whisk the mixture, starting from the center and slowly working your way outwards. Continue whisking until the ganache is completely smooth, shiny, and lump-free.
- Cool to thick consistency. Let the ganache cool at room temperature. It will thicken as it cools. For a frosting consistency, let it sit for about 1-2 hours, stirring occasionally. For a drip glaze, use it while it’s still warm but has a slight thickness. If it gets too thick, you can gently reheat it over a double boiler.
Part 4: Assembling the Cake
This is where all the components come together to create a stunning, multi-layered dessert.
Instructions
- Level the cakes. Using a long serrated knife, carefully trim the tops of the cooled cake layers to make them perfectly flat. This ensures the cake layers stack neatly and evenly.
- Create the dam. Place one cake layer on a serving platter or cake stand. Using a piping bag or a spoon, pipe a ring of chocolate ganache around the outer edge of the cake layer. This “dam” will hold the raspberry filling in place.
- Fill and stack. Spread half of the raspberry filling evenly inside the ganache dam. Top with the second cake layer. Repeat the process: pipe a ganache dam, spread the remaining raspberry filling, and then top with the third and final cake layer.
- Crumb coat. Use a thin layer of ganache to cover the entire cake (top and sides). This “crumb coat” seals in any loose cake crumbs and provides a smooth base for the final layer of frosting. Place the cake in the refrigerator for at least 15-20 minutes to allow the crumb coat to set.
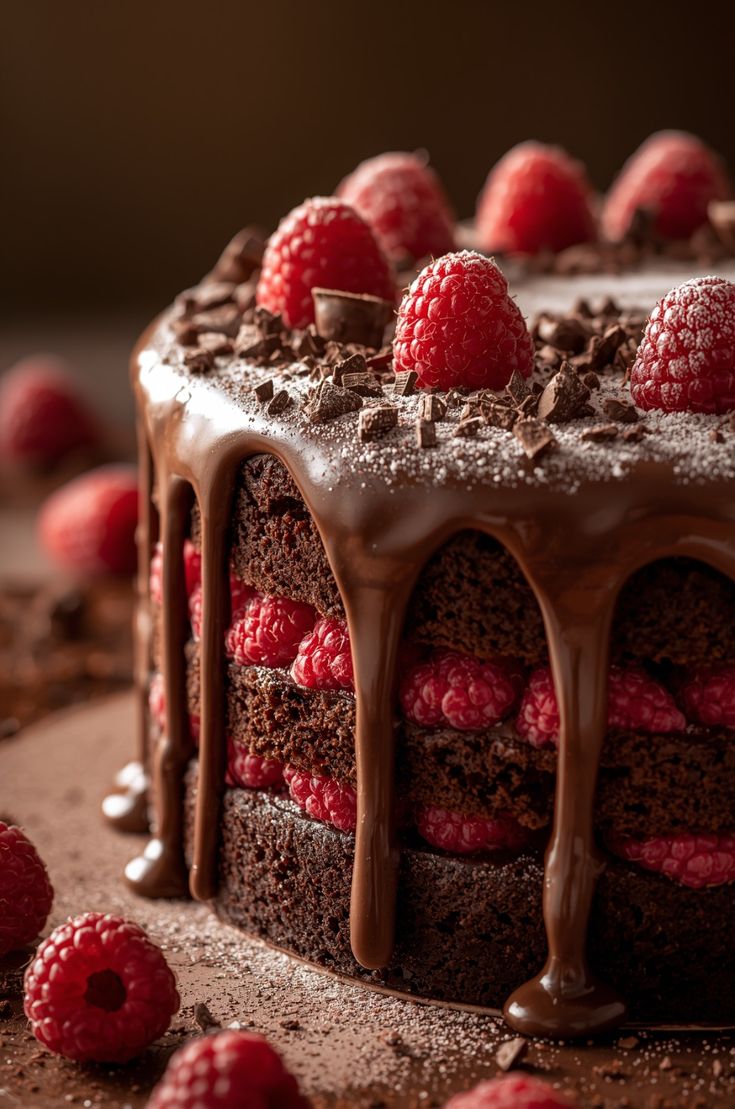
- Final frost and decorate. Once the crumb coat is firm, frost the entire cake with a thicker, final layer of ganache. Use a spatula to smooth the top and sides. For a beautiful drip effect, use some of the ganache while it’s still slightly warm and pour it on top, letting it naturally drip down the sides.
- Garnish and serve. Finish the cake by arranging fresh raspberries on top. For an extra touch of elegance, you can also add chocolate curls or a dusting of powdered sugar. Refrigerate the cake for at least 30 minutes before serving to allow the ganache to firm up.
Enjoy your beautiful and delicious Chocolate Raspberry Layer Cake!