Mini Tiramisu Cups: The Ultimate Elegant No-Bake Dessert
Looking for a dessert that screams sophistication yet is incredibly easy to make? Say hello to Mini Tiramisu Cups. This recipe takes the classic Italian masterpiece, Tiramisu—meaning “pick me up” in Italian—and transforms it into perfectly portioned, single-serving desserts. Forget messy slicing; these cups are an elegant no-bake dessert ideal for parties, holidays, or any special occasion where you want to impress your guests without the fuss.
These individual servings offer the perfect ratio of creamy, cloud-like mascarpone filling, strong coffee-soaked ladyfingers, and a dusting of rich cocoa. Best of all? No baking required! You can prepare them completely ahead of time, making party planning stress-free.
Why Mini Tiramisu Cups are Perfect for Your Next Party
- Elegant Presentation: Serving desserts in individual glasses or jars instantly elevates the aesthetic. They look gourmet and professional.
- Portion Control: Eliminates the mess and stress of cutting a large cake. Each guest gets a perfect, ready-to-eat portion.
- No-Bake & Make-Ahead: This is a true no-bake recipe. Tiramisu actually tastes better the next day, allowing you to prepare the cups up to 24 hours in advance.
- Authentic Flavor: We use high-quality ingredients, including real espresso and a hint of liqueur, for that classic, unmistakable Italian taste.
Recipe: Mini Tiramisu Cups (Single-Serving Dessert)
This recipe yields 8 beautiful mini cups.
| Component | Prep Time | Chill Time |
| Total Time | 20 minutes | 4 hours (minimum) |
1. The Coffee & Liqueur Soak
The liquid soak is what gives tiramisu its moisture and signature bitter-sweet depth.
Ingredients:
- 1 cup strong espresso or very strong brewed coffee, cooled completely
- 1/4 cup coffee liqueur (e.g., Kahlúa) or dark rum (or substitute with 1/4 cup milk/water for alcohol-free)
- 1 Tbsp granulated sugar (optional, for less bitterness)
Instructions:
- In a shallow bowl, whisk together the cooled espresso, coffee liqueur (or substitution), and optional sugar until combined. Set aside.
2. The Creamy Mascarpone Filling
This is the cloud-like heart of the dessert. We use pasteurized eggs to ensure safety while keeping the classic, light texture.
Ingredients:
- 4 large egg yolks (pasteurized for safety, if possible)
- 1/2 cup granulated sugar
- 1 cup (8 oz) cold Mascarpone cheese, straight from the fridge
- 1 cup cold heavy whipping cream
- 1 tsp pure vanilla extract
- Pinch of salt
Instructions:
- Whip the Cream: In a large, separate bowl, use an electric mixer to beat the cold heavy cream and vanilla extract until stiff peaks form. Place this whipped cream bowl in the refrigerator while you prepare the yolk mixture.
- Prepare the Yolks (Zabaglione Base): In a metal bowl placed over a pot of barely simmering water (a double boiler or bain-marie), whisk the egg yolks and granulated sugar continuously. The steam’s gentle heat will dissolve the sugar and pasteurize the yolks. Whisk for about 5-7 minutes until the mixture turns pale yellow, doubles in volume, and is thick enough to coat the back of a spoon. This technique gives the cream stability and richness.
- Cool: Remove the bowl from the heat and continue to whisk (or use a hand mixer) for 1-2 minutes until the mixture has cooled slightly.
- Fold in Mascarpone: In a separate medium bowl, gently whisk the cold mascarpone cheese and a pinch of salt until smooth and creamy (do not over-mix). Gradually fold the warm yolk mixture into the mascarpone until fully combined and streak-free.
- Lighten the Cream: Gently fold about one-third of the whipped cream into the mascarpone mixture to lighten the base. Then, carefully fold in the remaining whipped cream until the entire filling is homogenous, airy, and light.
3. Assembly and Chill Time
This is where your elegant layers come together.
Ingredients:
- 24-30 ladyfingers (Savoiardi biscuits), depending on the size of your cups
- Unsweetened cocoa powder for dusting
- 8 individual serving glasses, jars, or small bowls (e.g., 6-8 oz capacity)
Instructions:
- Prepare Ladyfingers: Break or cut the ladyfingers into pieces that will fit neatly at the bottom of your serving cups.
- Dip and Layer: Quickly dip each ladyfinger piece into the coffee/liqueur soak. Do not soak for too long (only 1-2 seconds per side), as they will quickly become mushy.
- Layer 1 (Base): Place an even layer of the dipped ladyfingers at the bottom of each cup.
- Layer 2 (Cream): Spoon or pipe (using a pastry bag for a cleaner look) a generous layer of the mascarpone filling over the ladyfingers.
- Repeat: Add a second layer of quickly dipped ladyfingers and top with the remaining mascarpone cream.
- Smooth and Dust: Smooth the top layer of cream in each cup. Cover all the cups with plastic wrap and refrigerate for a minimum of 4 hours, but ideally overnight. Chilling allows the ladyfingers to soften, the flavors to meld, and the cream to set perfectly.
- Serve: Just before serving, generously dust the top of each cup with a layer of unsweetened cocoa powder using a fine-mesh sieve.
Expert Tips and Customization
The Key to Perfect Ladyfingers
The most common mistake when making Tiramisu is over-soaking the ladyfingers. They should be dipped very quickly—just enough to wet the surface. Remember, they will continue to absorb moisture from the cream as they chill, ensuring a soft, yet not soggy, texture.
Variations for Dietary Needs and Flavor
| Component | Substitution/Variation | Key Flavor Profile |
| Alcohol-Free Soak | Use strong brewed coffee mixed with 1 tsp vanilla extract and 1/4 cup cold milk or non-dairy creamer. | Classic coffee flavor without the bite of alcohol. |
| Chocolate Tiramisu | Add 1/4 cup melted, cooled dark chocolate to the mascarpone filling. | Richer, more decadent chocolate experience. |
| Dairy-Free Cream | Substitute mascarpone with cashew cream cheese and use a high-quality plant-based heavy cream (e.g., coconut or soy) for whipping. | Vegan/Dairy-Free option while maintaining a creamy texture. |
| Garnish Upgrade | Garnish the top with shaved dark chocolate, fresh raspberries, or a single candied coffee bean just before serving. | Adds color and complexity to the presentation. |
Make-Ahead and Storage
- Prep Time: These cups can be fully assembled and refrigerated for up to 48 hours before serving.
- Dusting: Always wait to dust the cocoa powder until just a few minutes before serving. If dusted too early, the moisture from the cream will absorb the cocoa, leaving a dull, less appealing layer.
- Storage: Leftovers can be stored in the refrigerator for up to 3 days, although the ladyfingers will continue to soften over time.
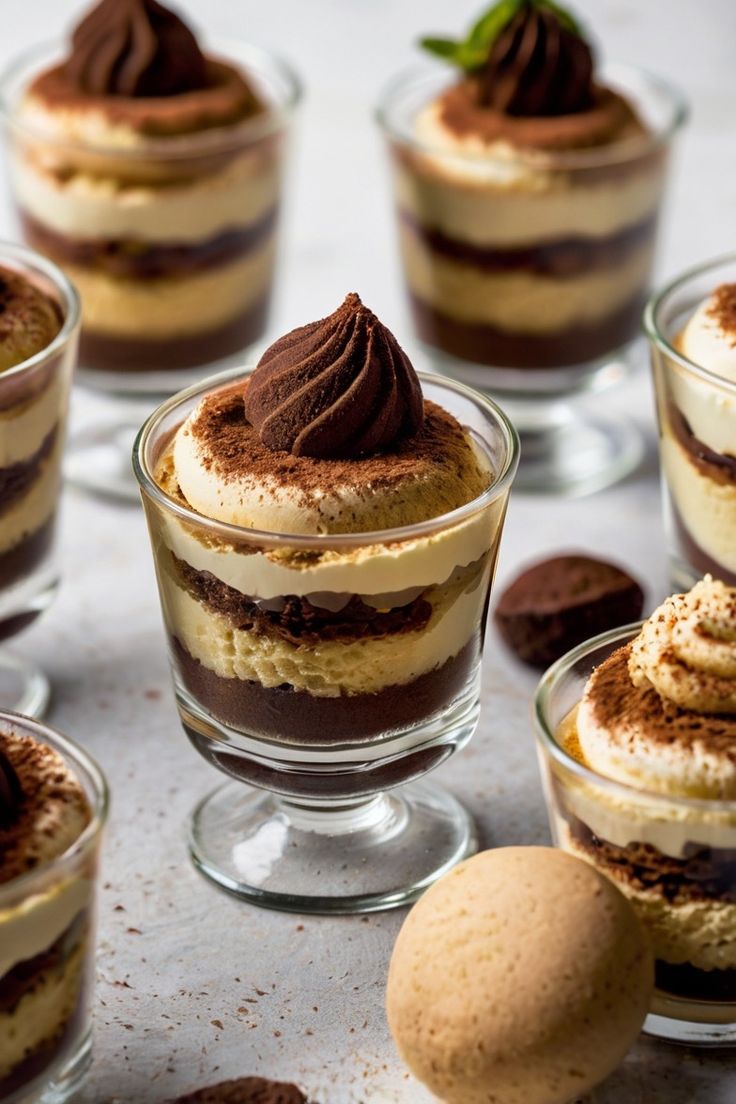
The Elegance of Individual Portions
The beauty of the Mini Tiramisu Cups lies in their versatility. They eliminate the need for serving utensils and are perfect for mingling. Setting up a beautiful display of these layered desserts on a tiered stand instantly transforms your party table. The clean lines of the cups show off the distinct layers—the dark, moist ladyfingers contrasted with the light, pale cream—making the dessert a feast for the eyes as well as the palate.
Whether you’re hosting a sophisticated dinner party or simply seeking a stress-free dessert for a special weeknight treat, these no-bake individual tiramisu desserts are a guaranteed success. Get ready for the compliments to roll in!
Enjoy this taste of Italian elegance!