Classic Baked Cheesecake with Graham Cracker Crust
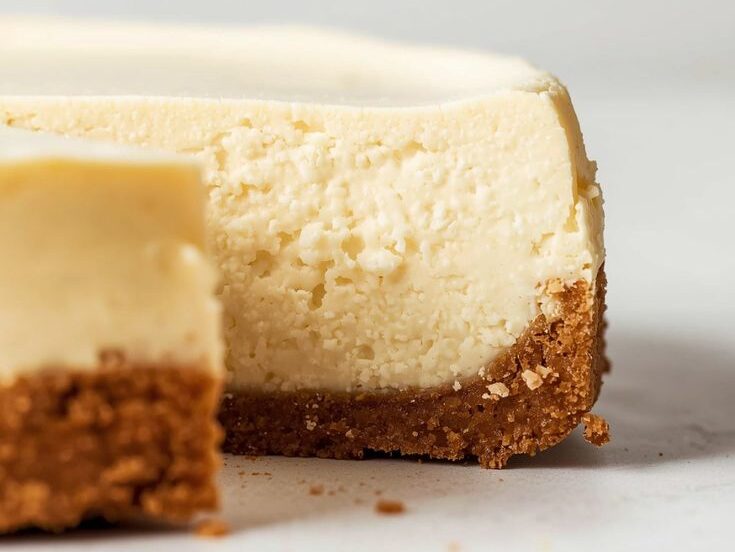
This recipe delivers a rich, creamy, and velvety cheesecake with a buttery, crisp graham cracker crust. While the process requires patience, the result is a truly spectacular dessert that’s worth every minute. This recipe is designed to be as foolproof as possible, with detailed instructions covering every step, from preparing the pan to serving the finished cake.
This recipe yields one 9-inch cheesecake, serving 12 to 16 people.
Part 1: The Graham Cracker Crust
The foundation of any great cheesecake is a sturdy, flavorful crust. The key here is to use enough butter to bind the crumbs without making them greasy. A little sugar adds a touch of sweetness and helps the crust crisp up during baking.
Ingredients
- 2 cups (about 12 full sheets) graham cracker crumbs
- 1/4 cup granulated sugar
- 1/2 cup (1 stick) unsalted butter, melted
Instructions
- Preheat the oven and prepare the pan. Preheat your oven to 350°F (175°C). For this recipe, you’ll need a 9-inch springform pan. A springform pan is essential because it allows you to easily release the cheesecake without inverting it. If you’re concerned about leaks, you can wrap the outside of the pan’s bottom and sides with a double layer of heavy-duty aluminum foil. This is especially important if you plan to use a water bath, which we will discuss later.
- Make the graham cracker crumbs. If you don’t have pre-made crumbs, you can easily make your own. Place the graham crackers in a food processor and pulse until they form fine, even crumbs. Alternatively, you can put the crackers in a large Ziploc bag and crush them with a rolling pin. Aim for a fine texture, as this will help the crust hold its shape better.
- Combine the ingredients. In a medium bowl, whisk together the graham cracker crumbs and the granulated sugar. Pour the melted butter over the crumb mixture. Using a fork or your fingers, mix until all the crumbs are evenly moistened and the mixture resembles wet sand. The consistency should be uniform, with no dry pockets of crumbs.
- Press the crust into the pan. Pour the crumb mixture into the prepared springform pan. Using the bottom of a measuring cup or a flat-bottomed glass, firmly press the crumbs into an even layer on the bottom of the pan and about 1 to 1.5 inches up the sides. Pressing the crust firmly is crucial for ensuring it doesn’t crumble when you slice the finished cheesecake. Make sure the edges are well-packed and uniform.
- Bake the crust. Place the springform pan on a baking sheet to catch any drips and for easier handling. Bake the crust for 10-12 minutes, or until it’s fragrant and slightly browned at the edges. This initial bake, or par-baking, helps the crust set and become sturdier, preventing it from getting soggy from the cheesecake filling.
- Cool the crust. Remove the pan from the oven and set it aside to cool completely while you prepare the filling. The crust must be cool before you add the filling; otherwise, the butter in the crust could melt into the filling, resulting in a greasy layer at the bottom of the cake.
Part 2: The Creamy Cheesecake Filling
The filling is where the magic happens. The secret to a perfect, crack-free cheesecake is using room-temperature ingredients and not overmixing the batter. Overmixing introduces too much air, which can cause the cake to rise too quickly and then fall, leading to a cracked surface.
Ingredients
- 4 (8-ounce) packages of full-fat cream cheese, at room temperature
- 1 1/2 cups granulated sugar
- 1 cup full-fat sour cream, at room temperature
- 1 teaspoon pure vanilla extract
- 1/4 cup all-purpose flour
- 4 large eggs, at room temperature
Instructions
- Prepare for the filling. Ensure all your ingredients, especially the cream cheese, sour cream, and eggs, are at room temperature. This is the single most important tip for a smooth, lump-free filling. If the ingredients are cold, they will not emulsify properly, and you’ll end up with a lumpy, grainy texture.
- Beat the cream cheese. In the bowl of a stand mixer fitted with the paddle attachment, or in a large bowl using a hand mixer, beat the cream cheese on medium-low speed until it’s completely smooth and creamy. This should take about 2-3 minutes. Scrape down the sides and the bottom of the bowl frequently to ensure there are no lumps. It should look like a smooth, thick frosting.
- Add the sugar. With the mixer on low, gradually add the granulated sugar. Continue to beat on low until the sugar is fully incorporated, and the mixture is smooth. Avoid turning the speed up to high. The goal is to gently combine the ingredients, not to whip them.
- Incorporate the sour cream, vanilla, and flour. Add the sour cream and vanilla extract. Mix on low speed until just combined. Scrape down the bowl again. Next, gently mix in the all-purpose flour. The flour acts as a stabilizer, helping to prevent cracks and ensuring a uniform, dense texture. Mix only until the flour is just incorporated.
- Add the eggs. This is a critical step. Add the eggs one at a time, mixing on the lowest speed possible. After each egg is added, mix just until the yolk disappears into the batter. Do not overmix! Overmixing the eggs is the primary cause of cracks in cheesecake. It’s better to have a few small streaks of unmixed egg than to overmix.
- Pour the filling into the crust. Once the batter is ready, it should be smooth and thick. Pour it into the cooled, par-baked graham cracker crust. Use a rubber spatula to scrape all the batter from the bowl. Gently tap the pan on the counter a few times to release any large air bubbles that may be trapped in the batter.
Part 3: Baking and Cooling the Cheesecake
Baking a cheesecake is more about gentle, even heat than high-temperature baking. A water bath is highly recommended for a perfectly smooth, crack-free top. It provides a moist environment and a gentle, even heat source that cooks the cheesecake from the sides and bottom without over-baking the top.
Instructions
- Prepare the water bath. Bring a large pot of water to a boil. Place your foil-wrapped springform pan inside a larger roasting pan. Carefully place the roasting pan with the springform pan on the oven rack.
- Bake the cheesecake. Pour the hot water into the roasting pan until it comes about halfway up the sides of the springform pan. This water bath technique ensures an incredibly creamy, smooth texture. Bake for 60-75 minutes. The cheesecake is done when the edges are set and slightly puffy, but the center 2-3 inches still have a slight wobble, like a loose Jell-O. The internal temperature should be about 150°F (65°C).
- Cooling inside the oven. This is the second most important step for preventing cracks. Once the baking time is up, turn the oven off, but do not open the door. Prop the oven door open slightly with a wooden spoon and let the cheesecake cool in the oven for about an hour. This gradual decrease in temperature prevents the cheesecake from shrinking too quickly and cracking.
- Cooling at room temperature. After the hour in the oven, carefully remove the cheesecake from the water bath and the roasting pan. Place it on a wire rack and let it cool completely to room temperature. This can take another 2-3 hours. The cheesecake will continue to set as it cools.
- Chilling the cheesecake. Once at room temperature, cover the cheesecake loosely with plastic wrap and transfer it to the refrigerator. Chill for at least 8 hours, but preferably overnight. This is non-negotiable! Chilling allows the cheesecake to firm up, making it easier to slice and enhancing its flavor and texture.
Part 4: Serving and Topping
A classic cheesecake is perfect on its own, but a simple topping can elevate it.
Serving Instructions
- Release from the pan. To release the cheesecake from the springform pan, run a thin knife along the inside edge of the pan before unclipping the springform. The knife will prevent the cheesecake from sticking to the sides and tearing.
- Slice it properly. For clean slices, use a long, sharp knife. Dip the knife in hot water and wipe it dry between each slice. This will give you perfectly clean, beautiful slices.
Topping Suggestions
- Fresh Berries: A simple, elegant choice. Garnish with a mix of fresh strawberries, blueberries, and raspberries.
- Sour Cream Topping: For an extra layer of tangy richness. In a small bowl, whisk together 1 cup of sour cream, 2 tablespoons of sugar, and 1/2 teaspoon of vanilla extract. Spread this mixture over the cheesecake during the last 5 minutes of baking.
- Fruit Compote: A simple compote made from your favorite fruits (e.g., cherry, raspberry, or blueberry) simmered with a little sugar and lemon juice.
- Caramel Sauce or Chocolate Ganache: For a decadent touch, drizzle with a homemade caramel sauce or a simple chocolate ganache before serving.
Expert Tips for a Flawless Cheesecake
- Patience is a virtue. Don’t rush any step. Room temperature ingredients, slow mixing, and gradual cooling are the keys to success.
- Don’t overmix. Overmixing incorporates air, which can cause the cake to rise and then fall, leading to cracks. Mix on low speed and stop as soon as the ingredients are combined.
- The water bath is your best friend. A water bath is the most reliable way to bake a creamy, crack-free cheesecake. It ensures even cooking and prevents the cheesecake from over-baking.
- The wobble test. The cheesecake should be jiggly in the middle, but not liquid. A slight wobble is a good sign that it is cooked just right.
- Gradual cooling. Never take the cheesecake directly from the oven to the countertop. The sudden temperature change will shock the cake and cause it to crack. Cool it slowly inside the oven first.
- Chill overnight. The overnight chill is essential for the cheesecake to fully set, develop its rich flavor, and become sliceable.
This classic baked cheesecake recipe is more than just a dessert; it’s a testament to the power of technique and patience. Following these detailed steps will give you a stunning, delicious cheesecake that will surely impress anyone who tries it.